Using the Advanced Preference Tools
The Advanced preference tools enable you to customize the behavior and appearance of your applications, panels, and other user interface items. You can use the Advanced preference tools to configure file types, your default applications, and your panels. You can also use the Advanced tools to customize your sessions and startup programs. You can also use the Advanced tools to choose a theme for the desktop, and how to customize your application menubars and toolbars. This chapter describes how to use the Advanced tools to customize your desktop.
- II.10.1. Opening an Advanced Preference Tool
- II.10.2. Configuring File Types and Programs
- II.10.3. Customizing Your Panels
- II.10.4. Choosing Your Preferred Applications
- II.10.5. Configuring Session Properties and Startup Applications
II.10.1. Opening an Advanced Preference Tool
You can open an Advanced preference tool in either of the following ways:
-
From the menu
Choose . Choose the tool that you require from the submenu. The dialog for the tool is displayed.
-
From the Start Here location
Open a Nautilus window, then choose . Alternatively, double-click on the Start Here object on the desktop background. The Start Here location is displayed. Double-click on the Preferences object in the Nautilus window, then double-click on the Advanced folder. The Advanced preference tools are displayed, as shown in the following figure:
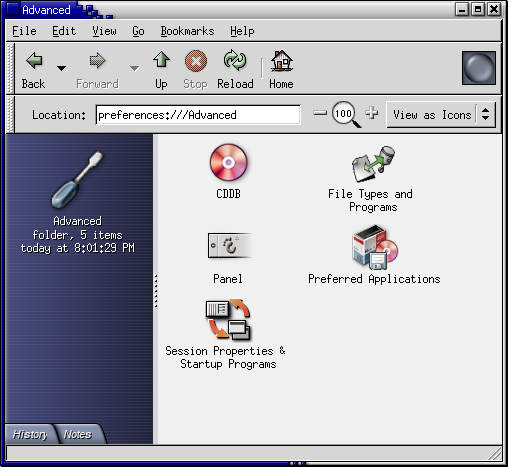
Double-click on the tool that you require. The dialog for the tool is displayed.
II.10.2. Configuring File Types and Programs
Use the File Types and Programs preference tool to specify how files of various types are created, displayed, and edited. For example, you can specify that if the MIME type of a file indicates that the file is an audio file, the desktop launches the file with an audio application.
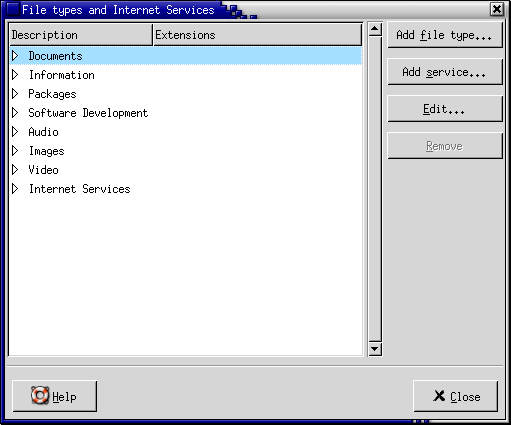
Table II.10-1 describes the elements on the File Types and Programs preference tool.
| Element | Description |
|---|---|
| Table |
To view the contents of a category of file types, click on right arrow next to the category name. The category expands, and displays a description of each file type, and the file extension that is associated with the file type. To select a file type that you want to work with, click on the file type. |
| Click on this button to add a file type. For more information, see Section II.10.2.1 ― To Add a File Type. | |
| Click on this button to add a service. For more information, see Section II.10.2.2 ― To Add a Service. | |
To edit a file type, a service, or a file type category, select the item that you want to edit, then click . |
|
| To delete a file type or a service, select the item that you want to remove, then click . |
- II.10.2.1. To Add a File Type
- II.10.2.2. To Add a Service
- II.10.2.3. To Edit a File Type Category
II.10.2.1. To Add a File Type
To add a file type, perform the following steps:
Choose to start the File Types and Programs preference tool.
Click on the button. The Add file type dialog is displayed.
-
Enter the properties of the file type in the dialog. The following table describes the dialog elements on the Add file typedialog:
Option Function No Icon Choose an icon to represent the file type. To choose an icon, click on the button. An icon selector dialog is displayed. Choose an icon from the dialog. Alternatively, to choose an icon from another directory, click . When you choose an icon, click . Description Type a description of the file type. MIME Type Enter the MIME type for this type of file. Category Enter the category to which you want the file type to belong in the File Types and Programs preference tool.
Choose button
Filename extensions Enter the filename extensions to associate with the file type. Enter a filename extension in the upper field, then click on the button. To delete a filename extension, select the filename extension in the lower field, then click on the button. Use category defaults Select this option to associate the application that is associated with the category, with the file type. Viewing component Information to be supplied in a future release. Default action Information to be supplied in a future release. Program to run If you do not select the Use category defaults option, specify a program to associate with the file type. Enter the command to start the program in this field. Alternatively, to choose a command that you entered previously, click the down arrow button, then choose the command to run.
You can also use the button to choose a command to run.
Needs terminal Select this option to run the program in a terminal window. Choose this option for a program that does not create a window in which to run. Click .
II.10.2.2. To Add a Service
To add a file type, perform the following steps:
Choose to start the File Types and Programs preference tool.
Click on the button. The Add service dialog is displayed.
-
Enter the properties of the service in the dialog. The following table describes the dialog elements on the Add servicedialog:
Option Function Description Type a description of the service. Protocol name Enter the protocol for the service. Program to run drop-down list box Information to be supplied in a future release. Program Specify the program to associate with the file type. Enter the command to start the program in this field. Alternatively, to choose a command that you entered previously, click the down arrow button, then choose the command to run.
You can also use the button to choose a command to run.
Needs terminal Select this option to run the program in a terminal window. Choose this option for a program that does not create a window in which to run. Click .
II.10.2.3. To Edit a File Type Category
To edit a file type category, perform the following steps:
Choose to start the File Types and Programs preference tool.
Select the file type category that you want to edit. Click on the button. The Edit file category dialog is displayed.
-
Enter the properties of the service in the dialog. The following table describes the dialog elements on the Edit file categorydialog:
Option Function Name The name of the service. You can not edit this text box. Use parent category defaults Select this option to associate the application that is associated with the parent category, with this category. Default action Information to be supplied in a future release. Program to run Specify the program to associate with the file type category. Enter the command to start the program in this field. Alternatively, to choose a command that you entered previously, click the down arrow button, then choose the command to run.
You can also use the button to choose a command to run.
Needs terminal Select this option to run the program in a terminal window. Choose this option for a program that does not create a window in which to run. Click .
II.10.3. Customizing Your Panels
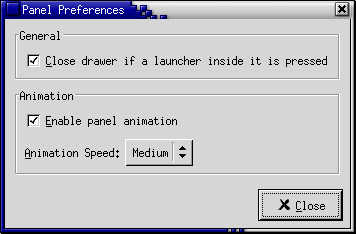
The Panel preference tool enables you to configure the behavior of panels. Any changes that you make with the Panel preference tool affect all of the panels on your desktop.
| Setting | Function |
|---|---|
| Close drawer if a launcher inside it is pressed | Select this option if you want a drawer on a panel to close when you choose a launcher in the drawer. |
| Enable panel animation | Select this option if you want your panels to show and to hide in an animated style. |
| Animation speed | Select the speed of the panel animation from the drop-down list box. |
II.10.4. Choosing Your Preferred Applications
Use the Preferred Applications preference tool to specify the applications that you want the desktop to use when the desktop starts an application for you. For example, you can specify xterm as your preferred terminal application. When you open the menu then choose , xterm starts.
You can customize the settings for the Preferred Applications preference tool in the following functional areas.
- Web Browser
- Text Editor
- Terminal
- II.10.4.1. Web Browser Settings
- II.10.4.2. Text Editor Settings
- II.10.4.3. Terminal Settings
II.10.4.1. Web Browser Settings
Use the Web Browser tabbed section to configure your preferred web browser.
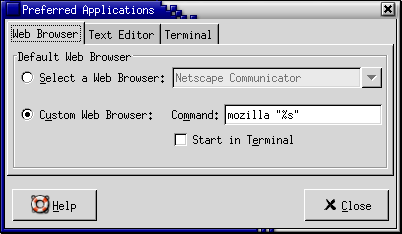
Table II.10-3 lists the preferred web browser settings that you can configure.
| Option | Function |
|---|---|
| Select a Web Browser | Select this option if you want to use a standard web browser. Use the drop-down combination box to specify your preferred web browser. |
| Custom Web Browser | Select this option if you want to use a custom web browser. |
| Command | Enter the command to execute to start the custom web browser. |
| Start in Terminal | Select this option to run the command in a terminal window. Select this option for a browser that does not create a window in which to run. |
II.10.4.2. Text Editor Settings
Use the Text Editor tabbed section to configure your preferred text editor.
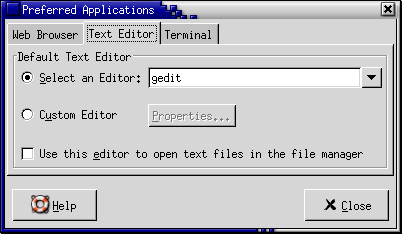
Table II.10-4 lists the preferred text editor settings that you can configure.
| Option | Function |
|---|---|
| Select an Editor | Select this option if you want to use a standard text editor. Use the drop-down combination box to specify your preferred text editor. |
| Custom Editor |
Select this option if you want to use a custom text editor. A Custom Editor Properties dialog is displayed.
|
| Click on this button to display the Custom Editor Properties dialog. Use the dialog to modify the properties of the custom text editor. | |
| Use this editor to open text files in the file manager | Select this option if you want the file manager to start the custom text editor to display text files. |
II.10.4.3. Terminal Settings
Use the Terminal tabbed section to configure your preferred terminal.
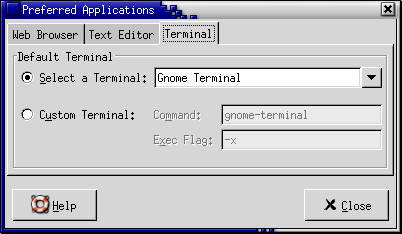
Table II.10-5 lists the preferred terminal settings that you can configure.
| Option | Function |
|---|---|
| Select a Terminal | Select this option if you want to use a standard terminal. Use the drop-down combination box to specify your preferred terminal. |
| Custom Terminal | Select this option if you want to use a custom terminal. |
| Command | Enter the command to execute to start the custom terminal. |
| Exec Flag | Enter the exec option to use with the command. |
II.10.5. Configuring Session Properties and Startup Applications
The Session Properties & Startup Programs preference tool enables you to manage your sessions. You can set session preferences, and specify which applications to start when you start a session. You can configure sessions to save the state of applications on your desktop, and to restore the state when you start another session. You can also use this preference tool to manage multiple GNOME sessions.
You can customize the settings for sessions and startup applications in the following functional areas:
- Session Options
- Startup Programs
- Current Session
- II.10.5.1. Setting Session Options
- II.10.5.2. Configuring Startup Applications
- II.10.5.3. Setting Session Properties
II.10.5.1. Setting Session Options
Use the Session Options tabbed section to manage multiple sessions, and to set preferences for the current session.
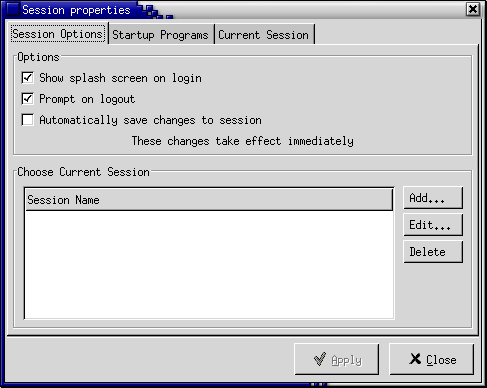
Table II.10-6 lists the session options settings that you can configure.
| Option | Function |
|---|---|
| Show splash screen on login | Select this option to display a splash screen when you start a session. |
| Prompt on logout | Select this option to display a confirmation dialog when you end a session. |
| Automatically save changes to session |
Select this option if you want the session manager to save the current state of your session. The session manager saves the session-managed applications that are open, and the settings associated with the session-managed applications. The next time that you start a session, the applications start automatically, with the saved settings. If you do not select this option, when you end you session the Logout Confirmation dialog displays a Save current setup option. |
| Choose Current Session |
Use this area of the dialog to manage multiple sessions on the desktop, as follows:
|
II.10.5.2. Configuring Startup Applications
Use the Startup Programs tabbed section of the Session Properties & Startup Programs preference tool to specify non-session-managed startup applications. Startup applications are applications that start automatically when you start a session. You specify the commands that run the non-session-managed applications in the Startup Programs tabbed section. The commands execute automatically when you log in.
You can also start session-managed applications automatically. For more information, Section II.10.5.1 ― Setting Session Options.

Table II.10-7 lists the startup applications settings that you can configure.
| Option | Function |
|---|---|
| Non-session-managed Startup Programs |
Use this area of the dialog to manage non-session-managed startup applications as follows:
|
II.10.5.3. Setting Session Properties
Use the Current Session tabbed section to specify startup order values, and to choose restart styles for the session-managed applications in your current session.
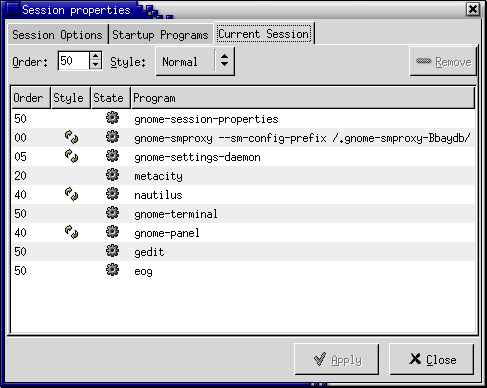
Table II.10-8 lists the session properties that you can configure.
| Option | Function |
|---|---|
| Order |
The Order setting specifies the order in which the session manager starts session-managed startup applications. The session manager starts applications with lower order values first. The default value is 50. To specify the startup order of an application, select the application in the table. Use the Order spin box to specify the startup order value. |
| Style |
The Style setting determines the restart style of an application. To select a restart style for an application, select the application in the table, then choose one of the following styles:
|
| Click on the button to delete the selected application from the list. The application is removed from the session manager, and closed. Deleted applications are not started the next time that you start a session. |